As per request, I am going to do my best to do a write-up on how I built and shoved a 7AGE into my 1981 tercel. Yes, this isn't a 2nd gen tercel, but the drivetrain and components are the same, minus the 4wd stuff. This is the 2nd attempt at writing this as the first draft was lost thanks to the auto logout feature
Photos will be posted later, I am currently writing this at work without access to my phone / picture gallery.
CURRENT ENGINE BUILD
- 7afe block
7afe rods and pistons
4age big port blue top head
4age stock head gasket
Scorcher 4age distributor
Pertronix Flamethrower .6 ohm
Holley Sniper 2300 2bbl w/ master kit
4agze intake
Custom exhaust
Custom alternator bracket
Modified water pump
3ac oil pan
Stock clutch and flywheel
4age oil pump
Broached crank timing gear
Mellings b-0111 timing belt
Alright, so I just need to fill in some minor details before going into the build. It's necessary to explain a few things I figured out along the way.
Why 7age? Well, that wasn't the original plan. I wanted to replace the junk 3ac in my '88 T4WD with a 4a. However, as my friend and I were pulling the motor from a '96 geo prizm, we learned that it wasn't a 4a, but in fact was a 7a. So instead of a 4ac, I'll have a 7ac.
How did we figure out it was a 7a? While searching the cruddy stickers on the hood of the car, we saw that it had listed both the 1.6l and 1.8l on there. After a few forum searches, we read that the 7a's used a 2 piece oil pan, whereas the 4a used a single piece oil pan. Sweet, I guess I'll be building a 7ac!
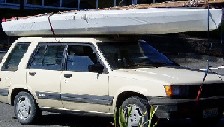
Why did you cram the 7age into your 1981 tercel and not the 1985 tercel? Well, about an hour after I got home one night, a drunk driver came flying through my neighbors yard, jumped my driveway, drove over my car, and fled. I tried making the crushed wagon into a truck, but my fabrication skills suck, and by cutting the roof off, almost all of the structural integrity was lost. The 7ac did see some action in my '88 T4WD, but I neglected to fix oil leaks on the tranny, and it self destructed on the way home one night. Plus, the 7ac had some inherent issues that I hadn't sorted out yet, so it got pulled before I scrapped the car. The 3ac in the '81 was tired, so I figured instead of rebuilding it, lets just shove a 7age into it.
Engine Build
I will do my best to describe what had to be done to make this work. It wasn't hard, but all the small piddly things do add up, which can be very frustrating at times. Some of the things listed were done / figured out when this motor was a 7ac, so keep that in mind.
Bottom end / block
So, first things first. You'll need to get yourself a 7a / 7afe. In the states, you can find them in the higher trim package AE102 toyota corollas / geo prizms. If I remember correctly, the geo we pulled the motor from had power everything. The junkyard website listed it as having a 1.6L, but we figured out that it was a 1.8L 7afe after we got it pulled.
Starting at the crank, it uses the same 6-bolt pattern as the tercels, so you can reuse your flywheel stuff. In my case, my clutch is a mix between the 212mm and 200mm setup. Before deciding to swap a 7age into the '81 tercel, I had bought a new clutch for it cause the old one was slipping reaaaaallly bad. The clutch disk on the 7ac was shot from oil repeatedly getting onto it from the oil pan. So, I decided to use the new clutch I had. As I was assembling the 7age, I learned about the different flywheel sizes. The '81 tercel uses the 200mm, and the '85 uses the 212mm. Since I was working on a tight budget, and the 200mm flywheel was still installed on the tercel, I decided to reuse the old pressure plate with the 200mm clutch disk. It works, but isn't optimal. As of right now, I've got no slippage, but I will more than likely fix this when I pull the motor for the oil pan.
I replaced the crank bearings, conrod bearings, rings, and honed the cylinders. My build uses the stock 7afe pistons and rods.
Pistons and rods. Purists and people who care about optimal power will tell you that you must swap the 7afe pistons for the 4age pistons so the profiles match. Which, I agree is something you should do....if you have the money for it. See, the 7afe uses an 18mm(?) press-in wrist pin, whereas the 4age uses a 20mm(?) floating wrist pin. You can either pay 300-500 usd for "7age" rods, have the 7afe pistons bored out, or just use the 7afe stuff. Compression will be affected by this, but not by much.
If you do decide to reuse the 7afe pistons, you MUST clean the oil ports behind the oil scraper rings. The 7afe's were known to have horrendous oil burning issues, and it was cause of this.
Oil Pan Hooooo boy, this one was a huge pain. And still is. When it comes to the actual bottom of the block, there are two different styles. The "rectangular" 3ac style, and the "indent" style of the later 4afe and 7afe. The indent style has a literal indent in the bottom of the block for the FWD transmissions, and you will have to get creative in how you fill this void. With the 7ac, I tried filling it with FIPG, which didn't really work all too well. During the trial and error of this method, the gap between the block and oil pan kept leaking copious amounts of oil onto my clutch, causing it to slip and destroying the clutch disk.
I then tried cutting a piece of steel to match the indent of the block, drilling and tapping a hole in it for the pan, and then JB welding it to the block so the 3ac pan has a surface to mount and seal to. That is what I currently have. It's not perfect, and one of my buddies with access to a CNC machine may be making an adapter plate. We'll see.
As for the original 2 piece pan, that wont work without extensive modification. It wont fit above the differential, nor will it clear the sway bar and steering rack. You could raise the motor mounts to get past this.
Last thing, since the 7a has a longer stroke than the 3a, the connecting rod extenders further down than the 3a's do. What does this mean? The #4 connecting rod will hit the pan! I found this out after laying a fresh bead of FIPG and bolting the pan to the block. I attempted to rotate the crank to work on timing, and hit a hard spot. Ugh. I fixed this by taking a 5lb sledge and caressing a curved dent in the pan so the rod will clear. Not perfect, but it works.
Bolt bosses A few things regarding the bolt bosses that are cast into the block. Not all of them are there. The two transmission braces can only be bolted to the block with one bolt. I'm not sure off the top of my head if all the motor mount bosses are there or not.
The boss that is where the starter goes needs to be ground off. The starter will not fit otherwise.
Timing Since the deck of the 7a is taller than the 4a by 15.4mm(?) the timing marks will not line up, and the ideal timing mark on the crank will fall between two teeth when trying to line up the cams. This can be corrected by either using adjustable timing gears (which kinda defeats their purpose) or by getting your timing gear broached. There are websites that sell broached gears, or they will broach yours if you have one for a lesser fee. No, I dont think you can use 3ac / 4ac gears. It needs to be 4age gears.
Also because of the deck height, you will need to use a different belt. There are two different belts depending on which oil pump you use.
7afe oil pump will need a 1986 porsche 944 timing belt (not the countershaft belt!)
4age oil pump will need a mellings b-0111 belt. (I used a timing belt from some european car. Had to get it imported cause I didn't know about the mellings belt at the time)
Top end / accessories
Now that we have the bottom end covered, now we shall dive into the top end of the motor.
Head I bought an old big port blue top from a stranger off club4ac (I think). Initially I didn't have it machined, but after an incident with valves and pistons, I had it all cleaned up, reshimmed, and a few of the valves replaced. Aside from that, everything is stock on the head. No fancy cams, gears, valves, etc.
As for head gaskets, I initially used the metal 7a gasket. I believe its .6mm, which is thinner than the 4age TRD gasket (.8mm ?). Once I got the engine going, I noticed a loud clicking sound from the top end. I, being super nervous, took the head back off to find 2 exhaust valves juuuuust barely clipping the pistons. This is when I had the head reworked at a machine shop. Right now I am using a stock 4age head gasket, but may go to the TRD one sometime down the road.
Intake / Exhaust This is where the fun begins! I am using a 4agze intake and a custom exhaust manifold.
Intake: The 4agze intake is a big port style intake, which works perfectly with the head I bought. I am not using the stock fuel + ignition system since I didnt have a parts car, nor do I feel like chasing down old parts with questionable reliability. A little bit of metal had to get shaved off the bottom to clear the water pump outlet (which I will get to later). I also had to open up the intake hole so the butterflys on my fuel system could open up all the way. I had a rochester adapter plate modified to work with the 4agze intake, which is bolted to a Holley Sniper 2300 2bbl efi system.
Exhaust: First time was hand made using a flange from a 20v blacktop header, 2" exhaust pipe and a 2" 45* pipe from advance auto. This one worked alright, but extreme heat and corrosion killed it. I had another "professionally" made from stainless, which took 3 months to do since the shop was ran by morons, and I had to have my friend fix their fuck ups in his free time.
You can buy stainless flanges for the 4age from this guy on ebay:
(https://www.ebay.com/itm/304-Stainless- ... 2749.l2649)
BE CAREFUL WHEN WELDING STAINLESS1!!!11! The "professional" welding shop didn't do this and warped the ever living snot out of the flange. UGH.
As for fitment, I cant really tell you what angles everything is welded at. I ran the down pipe through the "window" between the frame and the steering shaft. Just make sure ALL your wires are clear of this, as well as your clutch cable.
Fuel Delivery Since I didn't have any of the toyota MPFI hardware, I was stuck as to what to do. I was doing research and came across a Holley Sniper 2300 2bbl unit. "Self learning fuel system!" The self learn is a blessing and a curse. If you don't know anything about EFI tuning, it will self learn itself into the ground. You also wont get optimal power with the self learn tune. But, it will start right up after you install it!
I had a rochester carb adapter modified to mate with the 4agze intake since the holes were already super close. A friend used some new aluminum tig rod, filled the rochester holes, and redrilled the holes for the 4agze intake. I am currently using the stock throttle cable with a homemade throttle bracket.
I bought the master kit from holley, which comes with everything needed to get the unit up and running. Fuel lines, fuel pump, o2 sensor, handheld display, etc. That kit is like $1250. If quality control and the self learn were better, I could understand that price.
For fuel lines, I used 5/16"-3/8" adapters for both the feed and return line.
Feed: Tank -> adapter -> prefilter -> pump -> post filter -> rubber to holley unit
Return: Holley unit -> rubber to adapter -> stock steel return line
Wiring this unit is fairly simple. It can control ac and efans if that suits your fancy. I am trying to get my sniper tuned properly without controlling the fans and ac. Currently when either are turned on, the idle starts loping really bad.
Ignition There are 3 different solutions for this (that I can think of). I have tried 2 of them, and only like 1 of them.
Hyperspark: Since I wanted a plug n play setup initially, I found a company in New Zealand selling something called a "Hyperspark". All it is is a Transistorized ignition box, kinda similar to what motorcycles use. In order to use this, you need the uber rare 4agze hall effect distributor, or the CAS unit. I sourced one from outside of the states. This worked for awhile, until the main power transistor burned out, leaving me stranded on the side of the road. I tried getting it replaced, but the owner is very unresponsive to emails, and will only respond when you tell him youre going to request a refund through paypal since he hasn't responded in the last 4 weeks.
Scorcher: Very expensive, but worth every penny. People are super friendly, and are willing to help you every single step along the way. They are based in australia, so they may get back to you at like 2am. I work 2nd shift, so that works perfectly with me.
They require you to send them a 4age dizzy gear that uses a roll pin since I assume that part is NLA. The dizzy itself is a HEI based, using a fairly common bosche module. However, if you need a cap and rotor, you'll have to get ahold of them since they use australian bosche parts to make the dizzy.
I am using NGK plug wires, which are are on the short side TBH. Mated to the dizzy is a Pertronix Flamethrower 0.6 ohm ignition coil.
Ford EDIS: I have seen this used on a 4ac. Ford made a module to replace distributors called the EDIS. If you pair this with a microsquirt computer, trigger wheel, and a VR sensor, you could theoretically run COP or waste spark setups.
Accessories Being a stripper model, my car initially didn't come with any accessories. However, I did add A/C to it. I don't think power steering was an option on the first gen's, so I can't help much with that. The first gens also used all 'V' belts, so some of this info may not be relevant to 2nd gens.
Alternator: An upper bracket had to get made for this. None of the brackets that bolt onto the 3a head will work on the 4age head. My buddy took an old 3a bracket, cut off the mounting portion of it, and welded on some flat stock. I think a hole had to be drilled and tapped perpendicular to the dizzy bolt hole. An extension also had to get welded onto the bracket so the alternator clears the distributor. Because of this, a longer belt had to get used. (BELT NUMBER HERE)
Water pump: Some of the info is a bit foggy on this in terms of what tubes came from what. I am currently using a 3a water pump (to retain the 3 bolt pulley) mated to I think an MR2 back plate. This allows the water pipe to be bolted onto the back of it. For the pipe on the back of the head, that came off an AE85/86 corolla I believe.
As for the the part of the water pump that is supposed to have the little bypass tube pushed into it, my friend and I VERY carefully tapped it for pipe thread, and used a brass 90* pipe fitting with a super short run of rubber hose connecting that to the head(? need to double check this). The bottom of the intake had to get shaved a little to give clearance to the brass elbow.
Conclusion: If any of this makes sense, then building a 7age shouldnt be too hard. Like I said, its all the small piddly things that add up real fast. There are definitely things I would like to fix and make better, so please do research before doing your 7age build. I can help if you have questions, but seeing as my car is a 1st gen, some of my knowledge may be limited since I havent owned a T4WD in over a year.