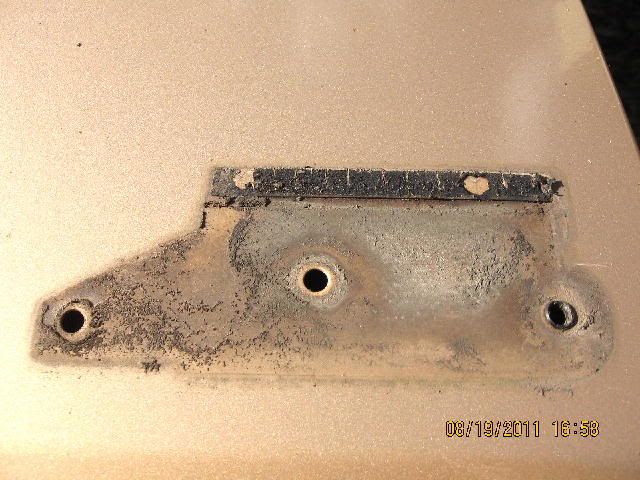
After removal of the inside cover, it appears that most of the water entered through the mounting holes for the "Tercel 4WD" emblem and the perished gasket where the backup light mounts into the ATM. There were plenty of water stain marks leading down to the inside bottom of the hatch. Unfortunately, Toy did not drill any drain holes there, so rust would seem inevitable after all of these years.
Sorry about no pix of the water marks on the hatch inside - just not enough room to maneuver the camera
So - I used a DAP black roof sealant * on the mounting studs of the emblem when installing, and also blobs on the inside. After removing the backup light and putting a fresh layer of the sealant on the existing perished mounting gasket, I replaced the backup light, masked the light and the ATM, and ran a bead around the mounted light's gap to ensure no water penetration - gotta use masking tape on the ATM and the lens. I also put blobs of sealant on the 10 or 11 mounting studs for the ATM.
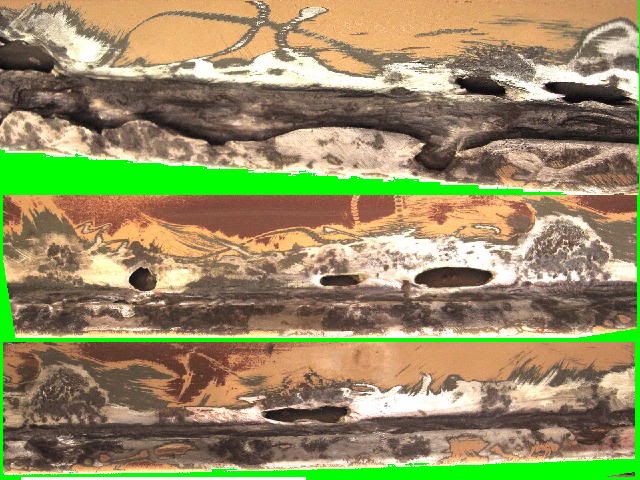
The rust...as evidenced in the photos, there were some good-sized holes and some layers of corrosion (fortunately none had penetrated the outside skin of the hatch); I elected to not fill them, and in fact drilled a couple more 1/4" holes in unrusted areas for drainage. I figured the old jagged holes could drain water as well as they could retain it before...
As far as the remediation went - after wirebrushing and vaccing and cleaning the area, I simply sprayed almost a whole can of Rust-Oleum Rust Reformer down in the affected areas and on the exposed areas until the paint dripped out from the holes. I also did an exposed black "stripe" just under the hatch inside cover at the base of the hatch down to the lip, but I've never found any touchup spray that comes even close to the gold (topaz) OE paint.
* The DAP product is Flex 230 black roof sealant, available at any home improvement store. It's easy to work with, dries quickly, and cleans up with water. It's great for sealing around window trims. The only disadvantage is that it only comes in caulking gun sizes, so you have to be careful with sealing the ends of the cartridge for future use.
I also used GOOP clear glue to hold those captive-on-the-inside white plastic darts in place in the cover to make it easier to remove "next time." And - for those of us with the destroyed-upon-removal darts holding the 3rd light in place - the Dorman Part 799-135 10-pack darts for Chrysler/Ford/GM fit just fine, albeit available only in black.
I would REALLY urge everyone to take a look at this area and, even if no rust is present, drill a few holes in the inside lip's metal where it curves to meet the hatch outer skin. I'd also recommend removing the inside cover and spraying the Rust Reformer down into the affected areas. And - Goldie was from Nashville and was 99% rustfree (I use the POS Dodge/Mitsu p'up on salty streets).
Tom M.
Hatch Emblem Position
Hatch Inside 1
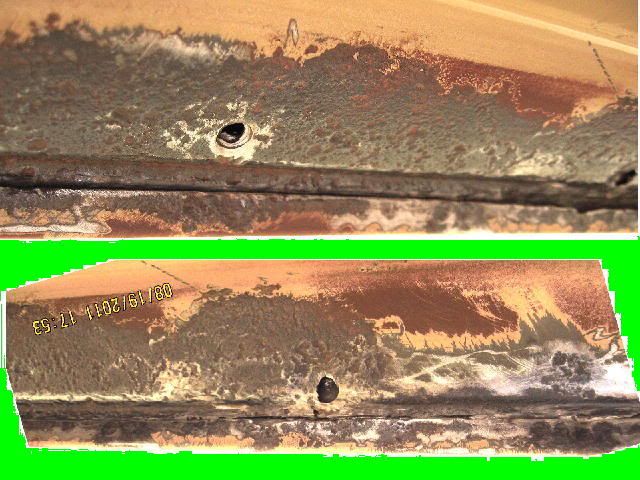
Hatch Inside 2
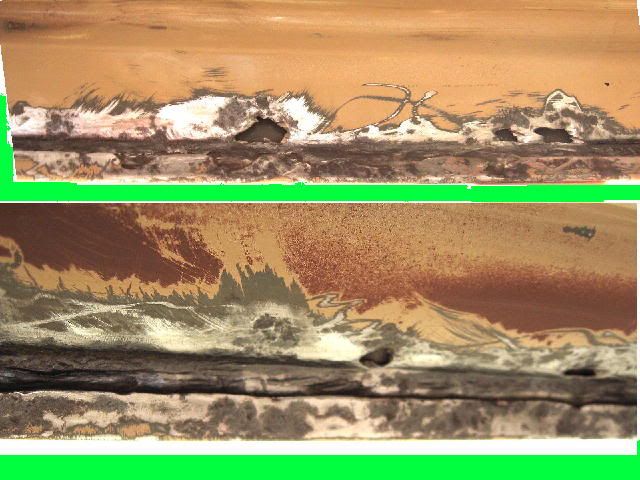
Hatch Inside 3
This is what it looked like after spraying with Rust Restorer and following up with two coats of R-O Satin Black::