Now you're ready to get started.
Purchase:
- Weber 32/36 carb. I used a DGAV with elec choke. Mine was used so it was a DGAV, but I believe that these are sold as DGEV nowaday. The E stands for electric. If you get a used carb, then for gods sake, give it a good cleaning/lube and even consider buying a full reconditioning kit if it has been sitting around for a while. Also, be sure to get the shorty air filter on this guy. If you don't then you'll have major hood clearance issues.
- Weber carb adapter plate. Mine cost me $50 online. This kit comes with the proper gaskets and mounting hardware to get the job done.
- Fuel Pressure Regulator (the Weber likes to get ~3 PSI). I used this: http://www.jegs.com/i/Holley/510/12-804 ... tId=745059. It was only $30 bucks and it comes pre-programed to deliver 2.7 PSI.
- Plenty of fuel line (make sure it's rated for petroleum transport). I used 1/4" ID fuel line hose.
- About 8-10 rubber vacuum line stopper thingies. I believe that you need 1/32" inner dia but I can't confirm this (long story)
- Hose barbs/hose clamps (the Holley fuel pressure regulator specified above likes a 3/8" NPT threaded side hose barb. Be sure to get some nice Teflon pipe thread tape to avoid any leaks. You'll need two hose barbs for the fuel pressure regulator and one for the EGR port stop plate.
- Electrical butt connectors and shrink wrap tubing
Step-by-step instructions (I'll update this if I learn later that I left anything out so this should be comprehensive)
Step 1 - unbolt your stock carb and clean off the gasket residue that is left on the intake manifold.
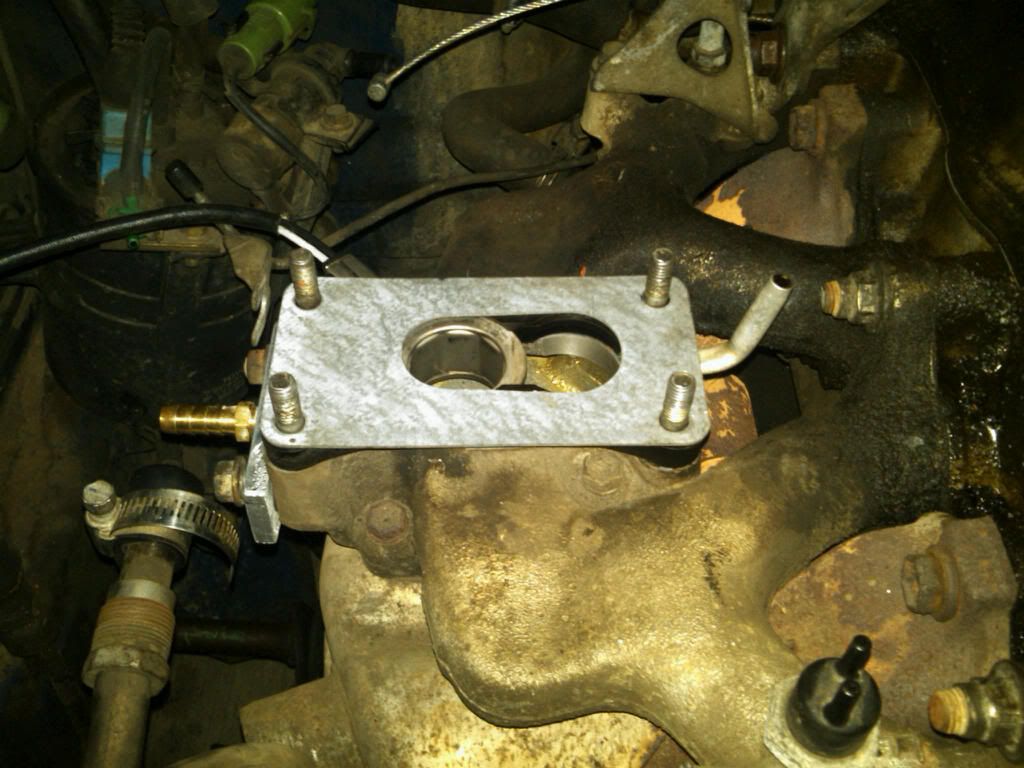
Step 2 - remove your EGR system (see photos below and Splatterdog's guide here: http://www.tercel4wd.com/forums/viewtop ... f=7&t=2954) -- This includes all vacuum lines connected to your TVSV, as well as the complex assembly of metal vacuum lines leading laterally along your valve cover. Keep everything you remove in case you need a spare bit in the future.
Step 3 - Use the EGR valve that you just removed as a template to mark out holes in a aluminum or steel block that will eventually be used to seal the EGR port. Tap center hole to accommodate a 1/4" or 1/8" NPT hose barb (I used a 1/4" NPT hose barb with good results, but Splatterdog uses a 1/8"). The side holes are simply through holes. I also used the EGR valve to serve as a template for a paper gasket that would be used to ensure no air leakage at the newly stopped EGR port. Splatter used Permatex as a gasket -- I'm sure this will work as well, but this simply wasn't the route that I decided to take.
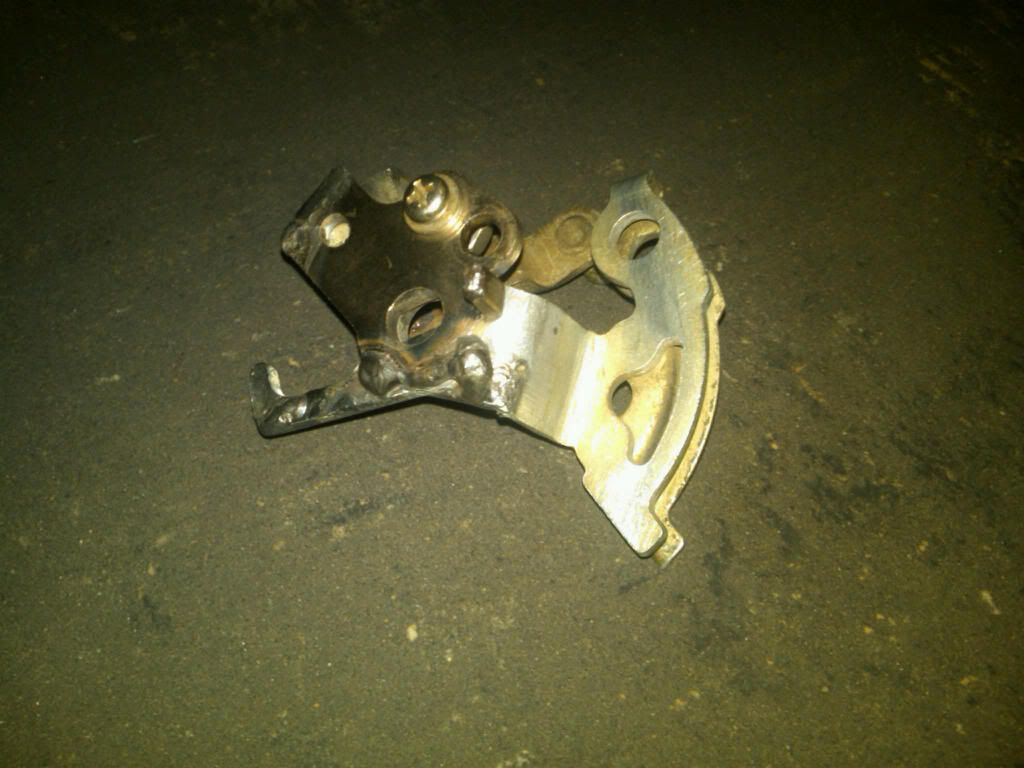
Step 4 - Remove bell crank from stock carb as well as the secondary part that is described in Splatterdog's sticky (http://www.tercel4wd.com/forums/viewtop ... f=7&t=5856 -- genius). Get a friend to spot weld these parts together and find a small bolt/nut/lock nut to attach this final assembly to the throttle crank on the Weber 32/36 carb. I ended up getting a local radiator shop to make the modification for me.
Here is what it will look like after you've done this:
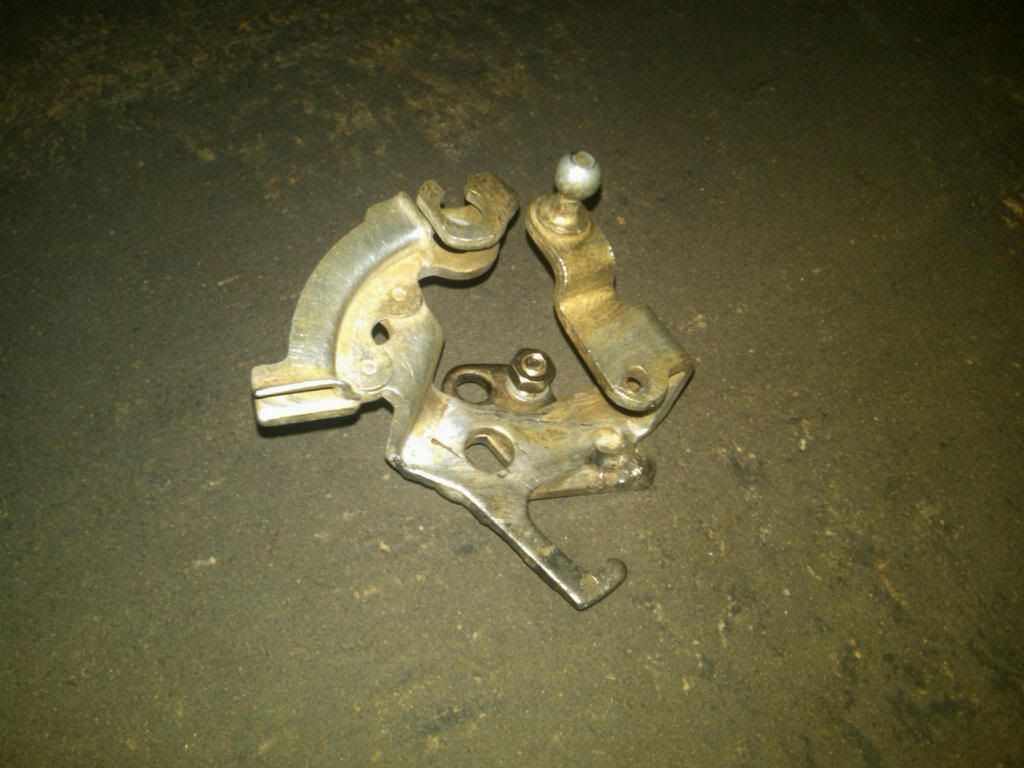
Step 5 - Install the modified bell crank on the Weber with the small bolt/nut/lock nut that you acquired in Step 4.
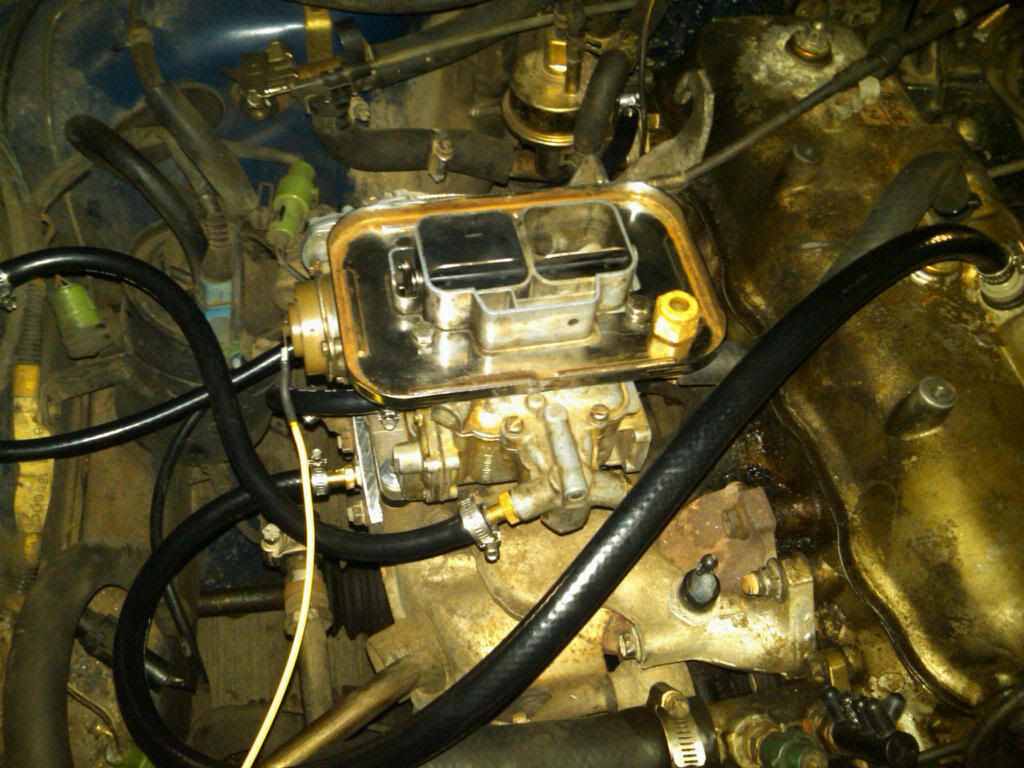
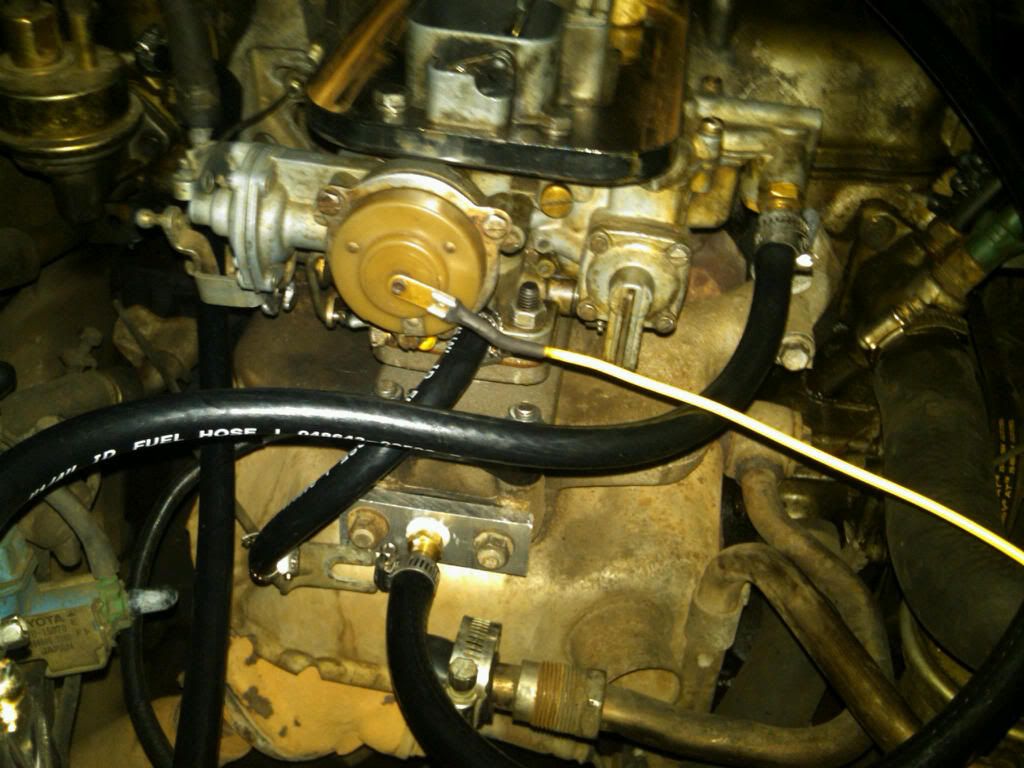
Step 6 - Install your fuel pressure regulator in the area where your mess of an EGR system was previously located. Use the hole pattern in the mounting bracket to guide your drill holes. Make sure that you drill holes low enough to ensure hood clearance! Mount your fuel pressure regulator (your hose barbs should be installed at this point in time)
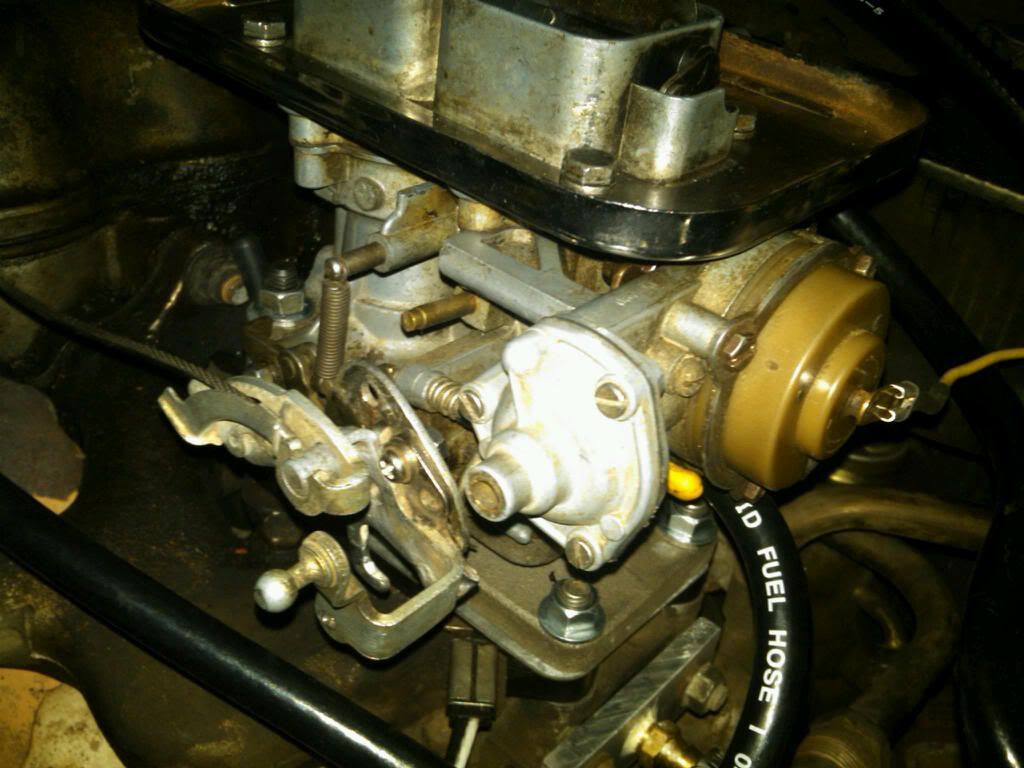
Step 7 - Install your Weber carb where your crappy Aisian used to be. Be sure that your mixture screw is not screwed all the way in -- you'll tune this later on in the final stages of the installation. You should already start to sense that this is going to be worth your time and effort! I kept my black phenolic spacer because I had to in order to achieve proper bolt/adapter plate clearance.
And here it is with the new carb installed and all the proper hoses connected:
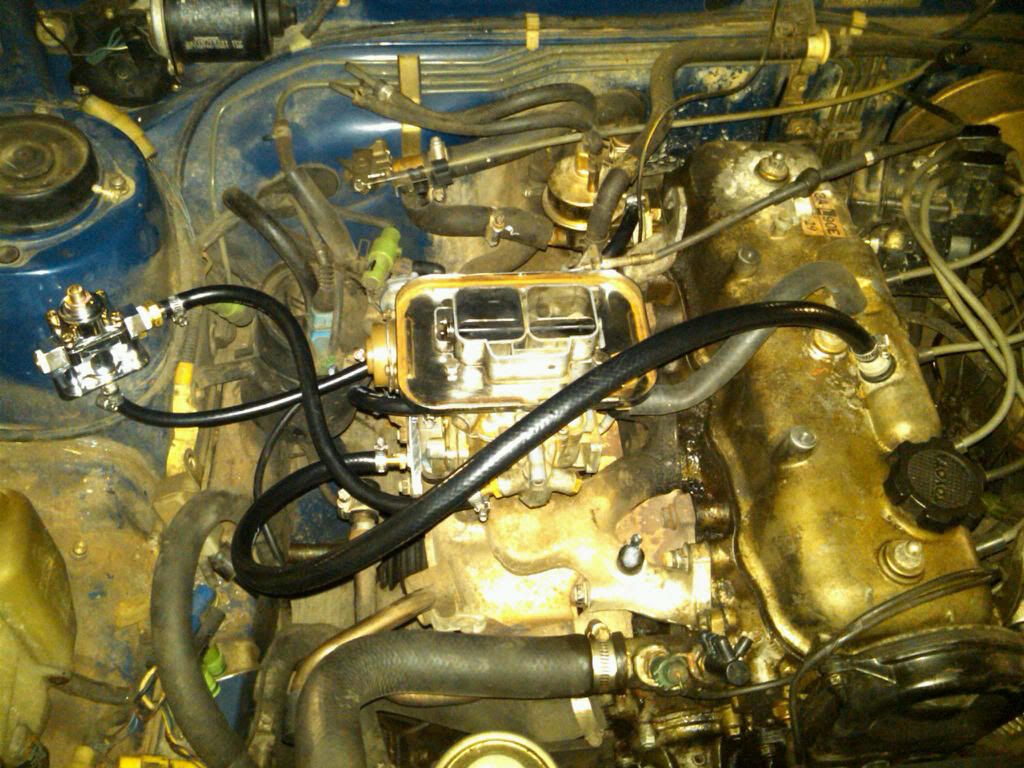
NOTE: You'll need the following hoses:
-- Hose to go from stock fuel pump to fuel pressure regulator (this will be fairly long, ~18". Be sure to measure it out first)
-- Hose to go from fuel pressure regulator to carb
-- Hose to go from distributor vacuum advance to either of the two ports on your "gas filter" that is located on the intake manifold. (Leave other two ports on your distributor vacuum advance open to the atmosphere).
-- Hose to go from PCV valve to EGR port stopper plate (UPDATE: this hose should be reinforced because it is under significant vacuum.)
-- Hose to go from air cleaner to valve cover top port (this is a larger inner diameter hose - 5/8" I believe, but again, be sure to measure yourself)
Be sure to use hose clamps on all these connection points.
Step 8 - Find power from the electrical connection previously associated with your stock carb and splice into it. I cut the wires after the green cylindrical connection point and spliced into the red wire (I have confirmed that this is correct -- confirmed with my multimeter!). Use shrink wrap tubing and electrical connectors to make the connection to the Weber electric choke (see photos above and below for further detail).
Step 9 - Tighten everything down and turn the engine over several times to fill the bowls of your Weber. (Confirm that this is in fact happening if your engine turns over excessively.) Check that your idle is within tolerance. The FSM says that you should be at ~800 RPM if you have power steering, ~650 RPM if you don't.
This is what the finished product should look like.

Be sure to adjust idle with the leanest mixture setting that you can muster without causing an erratic idle condition. This will keep your combustion as complete as possible, reducing deposit buildup in your engine/exhaust. It'll also help you get the best fuel economy from your Tercel 4WD too.
Final choke adjustment: After the engine has warmed up to operating temperature, ensure that choke is in the fully "off" position. Adjust choke element by loosening the 3 choke ring screws and turning the element in the proper direction, depending on your specific desire for early choke off or longer choke on timing.
Final Idle Speed Adjustment:
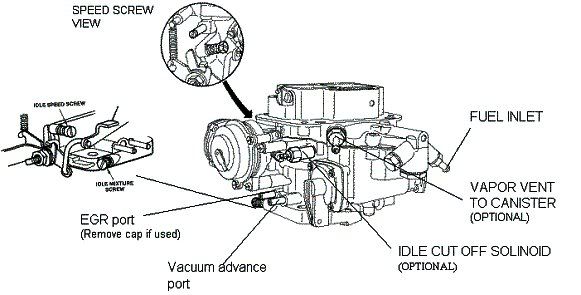
The Fast Idle Adjustment is the screw located behind the choke marked as "Speed Screw" in the diagram above.
With the engine warmed up and turned off, open the throttle and manually engage the choke plates (butterflies). Release the throttle and then release the choke plates. The fast idle cam should now be activated and the fast idle speed screw should be positioned on the cam shoulder. Start the engine DO NOT DEPRESS THE THROTTLE PEDAL OR THE CHOKE WILL DISENGAGE. To adjust the fast idle speed, screw it "in" (clockwise) to increase speed and "out" (counterclockwise) to decrease the RPM.
Pat yourself on the back. You just made a huge improvement to your T4WD!
EDIT: Check this http://www.redlineweber.com/html/applic ... et_kit.htmout for some interesting information about Weber jet sizes and info about today's leaner fuels. I am getting a bit of hesitation going from idle to slow acceleration and I suspect it's because I have small jets installed in my carb (this won't be as big of an issue if you buy your 32/36 new). Stay tuned for more updates.