A New Coat of Paint!
-
BowieTercel
- Newbie
- Posts: 24
- Joined: Sun Mar 06, 2016 7:35 am
- My tercel:: 1984 Toyota Tercel SR5
A New Coat of Paint!
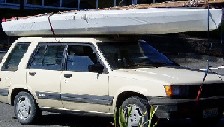
It's time for new paint so this thread will be about our process of getting the little rig ready for the paint shop. Our tercel came from a very dry climate and we continue to be amazed by the lack of rust. Due to the heat of said climate however, a lot of our plastics had been hurt by the sun including interior parts. We got extremely lucky though and found an Alaskan tercel, only a few hours away from our house, that had seized and had extensive rust issues, but all the plastics and interior were much better and best of all, matched our patterns. Here we go...
-
BowieTercel
- Newbie
- Posts: 24
- Joined: Sun Mar 06, 2016 7:35 am
- My tercel:: 1984 Toyota Tercel SR5
Re: A New Coat of Paint!
You do not have the required permissions to view the files attached to this post.
-
BowieTercel
- Newbie
- Posts: 24
- Joined: Sun Mar 06, 2016 7:35 am
- My tercel:: 1984 Toyota Tercel SR5
Re: A New Coat of Paint!
WINDSHILD WIPER ARMS: plastic foot rotates up exposing a nut with normal threads (lefty loosey)
I call these the WINDSHIELD GRILL: open hood unscrew 6 screws, remove rubber piece. Close hood slide grill forward then up and out.
Lower WINDSHIELD TRIM MOUNTS can now be unscrewed and removed (8 of em).
Other 2 sides and top WINDSHIELD TRIMS can be pryed up with trim tool as they are only held in by a few mastic (caulked) points.
REAR BUMPER was a pain with removing the top 12 nuts because they are hid by a top lip. Took forever to figure this one out until we spotted the offset box wrench set at harbor freight. They are 10mm and take an hour since we don't have ratcheting. Bottom was 12x 10mm bolts however all but three broke off because there's this thin neck on them that won't take any stress. So I plan to drill them out, tap then drive new bolts.
Will need to remove inner plastic trims to get to most other things including rear window, license plate holder, 4wd emblem, trunk lock, etc.
Tail lights are 4 8mm bolts you find behind the interior plastic.
-
BowieTercel
- Newbie
- Posts: 24
- Joined: Sun Mar 06, 2016 7:35 am
- My tercel:: 1984 Toyota Tercel SR5
Re: A New Coat of Paint!
REAR DOORS: remove 3x phillips screws in armrest, handle, and opener lever. To remove manual window cranks lever the crank away from the panel with a trim tool then use a cloth and work the clip out from the back.
You do not have the required permissions to view the files attached to this post.
-
BowieTercel
- Newbie
- Posts: 24
- Joined: Sun Mar 06, 2016 7:35 am
- My tercel:: 1984 Toyota Tercel SR5
Re: A New Coat of Paint!
Quick return to that bumper my wife just removed after a long time with the offset box wrench. I never knew what an offset wrench was before so here it is:
You do not have the required permissions to view the files attached to this post.
-
BowieTercel
- Newbie
- Posts: 24
- Joined: Sun Mar 06, 2016 7:35 am
- My tercel:: 1984 Toyota Tercel SR5
Re: A New Coat of Paint!
Peel out plastic membrane (I cut it out and retape it up to use as a pattern for dynamatting later).
You need to pry the inner window bottom rubber moulding up to remove then the whole panel will lift off after you popped all the trim clips.
That PILLAR that divides the two windows comes out next for that there are 2x 10mm bolts below the glass to remove plus 1x phillips screw on top under the rubber you only need to pull out to access.
Now roll down the window.
Pry out the retractable window channel moulding and pull up to free it from the window.
Now you can remve the divider pillar.
Pane will now slide back (a smidge) then up and out.
Pry up outside window trim (the black painted crome part running length of door).
Now STATIONARY PANE slides forwards and out.
OUSIDE DOOR HANDLE has 2x 10mm bolts behind it you can reach with an extension on your ratchet, then handle outward to reveal the mechanics a bit. That plastic part clipped around the rod pops back then you pry the assembly from that vertical rod creatively...
You do not have the required permissions to view the files attached to this post.
-
Petros
- Highest Ranking Member
- Posts: 11933
- Joined: Sun Jan 28, 2007 6:31 pm
- My tercel:: '84 Tercel4wd w/extensive mods
- Location: Arlington WA USA
Re: A New Coat of Paint!
Bowie,
you could have (and should) remove the whole bumper as an assembly. It is much easier, there are several plastic plugs under the rear carpet just in front of the hatch. Remove them and there are two 17 mm bolts to remove on each side as I recall, and the whole rear bumper assembly slides straight out. it will be easier to prep and mask if you get the steel sub bumper out of the way.
the front removes the same way, but the access is under the hood just behind the front grill. fast and easy if the bolts are not rusted into place.
'87 Tercel 4wd SR5 (current engine swap project)
'84 Tercel 4wd (daily driver, with on going mods)
'92 Mazda MPV 4wd (wife's daily driver)
'85 Tercel 4wd DLX auto(daughter's daily driver)
'01 Honda Civic (other daughter's daily driver)
'84 Tercel 4wd (daily driver, with on going mods)
'92 Mazda MPV 4wd (wife's daily driver)
'85 Tercel 4wd DLX auto(daughter's daily driver)
'01 Honda Civic (other daughter's daily driver)
-
BowieTercel
- Newbie
- Posts: 24
- Joined: Sun Mar 06, 2016 7:35 am
- My tercel:: 1984 Toyota Tercel SR5
Re: A New Coat of Paint!
Oh man I wish I had done it that way - super easy in contrast.